Jalview's Installer won't run on my Mac
Here are some symptoms we’ve observed when Jalview has failed to launch via webstart, or the Jalview installAnywhere could not be run.
In all cases, the Web start file (jnlp) and the Installer downloaded and unpacked successfully.
- Running the installer/jnlp file opens a “This program cannot be run because it comes from an unidentified developer”.
- For some reason, your Mac has not recognised our Apple Developer Signature (if you are running Jalview 2.8.1,please tell us about this!)
- Follow step 1, below - select the ‘Run anyway option’
- Running the installer opens a “This fileis damaged and should be moved to the trash”
- In this case, your Mac thinks someone has tampered with the installation program, although actually, what has happened is that you’ve probably just downloaded a new version of Jalview.
- You need to followstep 2 below - temporarily disable the security check
- Installer downloads but double clicking it does nothing.
- This usually means that there is something wrong with your Java installation.
- Control-click the install-jalview package and select the “Open Package Contents” option.
- Double click through the directories:Contents,MacOS
- Double click on ‘install-jalview’ (or ‘install’, for older Jalviews)- this will open up a terminal window with some commands that executethe installer program.
- If the installer still doesn’t launch, send us an email via jalview-discuss@jalview.org to let us know what the message is.
Changing the gatekeeper settings
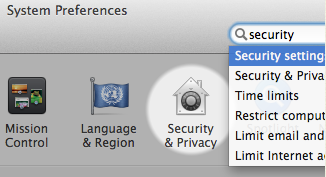
First, open your system settings panel, and go to the security and privacy section:

Step 1.__If you see a prompt like the one saying ‘Open anyway’, then click it to launch the program.

Step 2.__If you don’t see a prompt like the one above, then:
- You’ll need to click the padlock so you can make changes to the security settings, and then select the ‘Anywhere’ button.
- Then try launching the installer or the application again.
- Once you’ve launched the program you can return to the gatekeeper settings and switch back to your original security settings.